
Last Summer, I had an opportunity to work with Microsoft on the process of getting MSIX Applications created and released through the Microsoft Store. As a result, I ended up with the first MSIX package released in the Windows Store!
On my website at TMurgent.com, I have a large number of free community tools that I have created over the years. Some are standalone exes, some have exe or msi based installers. There is a variety of C and C++ Win32 applications, as well as C# .Net based apps. The all-time most popular download from the site is a C++ app originally written in 2003 and hasn’t been updated in over 10 years, and yet is still the most popular download almost every month. The tool, TMNETSIM (https://www.tmurgent.com/AppV/en/resources/tools-downloads/tools-downloads-perf/87-tools/performance-tools/177-tmnetsim-quick-and-easy-network-simulation-tool) , is a software WAN emulator that you can control to set parameters like delay, jitter, and loss. While the tool lacks features of expensive WAN emulators, it actually does a better job of simulating real-world internet connections without needing additional external load generators thanks to a Markov Chain implementation.
The deployment of the traditional MSI based installer for this app is very simple as is uses a very small subset of the Windows API and doesn’t have any dependencies. Furthermore, the app is the kind of tool such that it really didn’t make sense to try to take advantage of cool new modern features, like Live Tiles and Notifications. This made TMNetSim a great candidate to re-release as my first MSIX package as there would be little risk of needing code changes or shims.
I wanted to have a simple example of how a developer might create a MSIX version of an old package for the Store, and TMNetSim seemed ideal. Here is how I did it.
Step 1. Get a Code Signing Certificate. Eventually you will need this.
If you are going to submit to the Microsoft Store, you’ll need to get this certificate from them. This code signing certificate will be associated with your MSA account for all packages you publish so appropriately store and secure the certificate file. To get one, you will need to use Visual Studio. The free community edition is fine. You will need to create a (throwaway) Windows Universal App “Stub Project”. The name of the project doesn’t matter, but you will right click on the project, and under store click “Associate with the Windows Store”. Go through the wizard and obtain the code signing certificate associated with your MSA account. Save off and protect this code signing cert.
Otherwise (such as you are thinking about the Windows Store for Business), if you don’t have a certificate, start getting one now. If you might let outsiders (like contractors or business partners) have access, it should be from a public certificate authority and it will cost you some money. You’ll have to decide on your own if you need the Extended Validation level. If it is only for use within your company, you can create a code signing cert in AD and push out your AD Signing Certificate Authority to client via GPO.
To get started more even more quickly, just create your own self-signed cert via PowerShell and use that until you are really ready to submit to the store.
Step 2. Determine app compatibility. Before venturing too far, it is a good idea to determine basic application compatibility with running inside the MSIX container. Many older applications will require fixup shimming in order to work with the MSIX runtime. It makes sense to figure out those issues before thinking about the final packaging and publishing issues.
The simplest way to do this is to just use the MSIX Packaging Tool. This is a package that you can get from the Microsoft store (it actually isn’t a MSIX package but appear to be Centennial based) on a machine with Windows 10 1809 or above. To find it, just open up the store and search for MSIX; it shows up under “Apps”. It makes sense to do this work on a clean VM and not a production image. You just install and run the tool, create a new package, select your code signing cert, install your software using the existing installer, and save the package off.
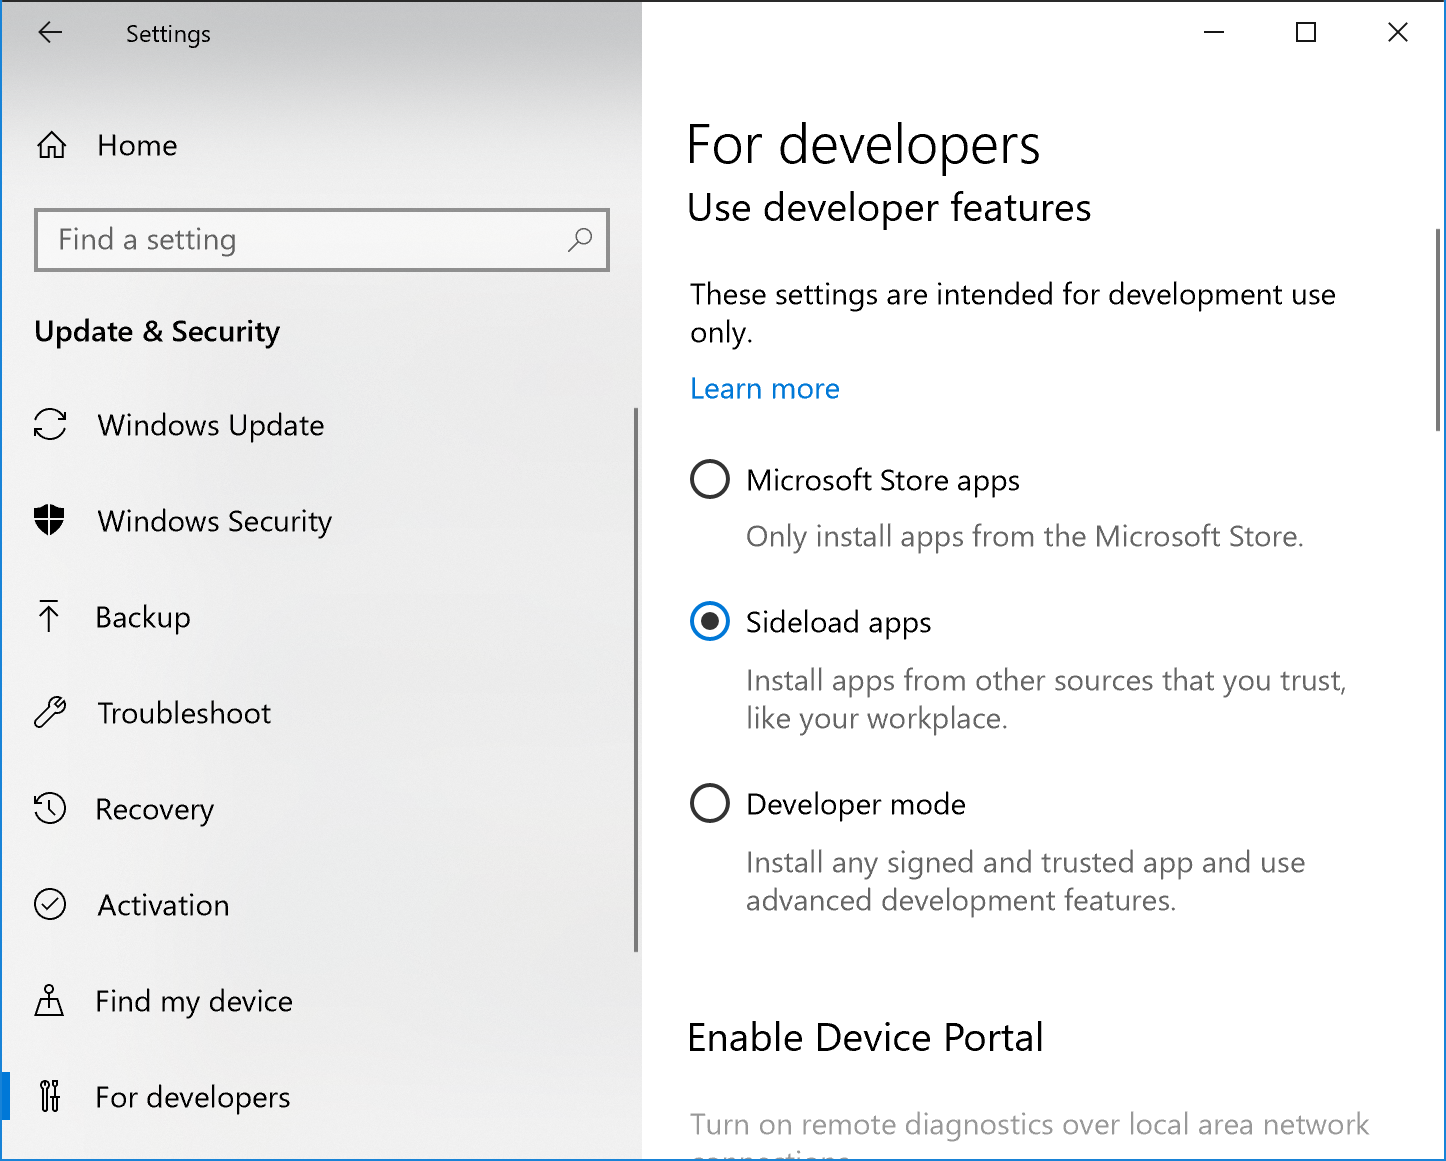
After you are done with the Packaging Tool, save the MSIX output file off to a safe share location and revert the VM. Then log back into the clean VM, and (as shown below) in All Settings, Updates and Security, For Developers, you configure the OS to allow Sideloading of modern apps. If you skipped the code-signing certificate you can still use the package if you select Developer Mode instead.
Now you can double click on the MSIX file you saved off to the network share and install the package. Run the app and determine if it is reasonably working.
If not, you may need fixups, or may require Windows APIs that are not supported by the MSIX runtime (yet). The best options are to build a package with the Package Support Framework (PSF, see https://github.com/Microsoft/MSIX-PackageSupportFramework) and the PSF Trace Fixup plus the PSFTracing program that I have submitted to the GitHub repository for PSF. At the time of this writing the code hasn’t been pulled into the main branch, so I won’t detail how to do that in this post. Another option, if you know App-V, is to create an App-V package and analyze it with the free AppV_Manage (https://www.tmurgent.com/appv/en/resources/AppV_Manage/221-appv-manage-introduction) tool from my website. The Analyzer isn’t intended to give you MSIX compatibility information, but it does expose most of the Windows APIs implemented by your installer at a category level.
In my case, TMNetSim worked flawlessly and didn’t need any fixups.
At this point, your next step depends on whether you want to create
the real MSIX package as a Visual Studio project or using something like the MSIX Packaging Tool. I chose to go the Visual Studio route using the new integration with Advanced Installer.
Step 3. Creating a MSIX Project in Visual Studio. I already had Visual Studio Enterprise and an older version of Advanced Installer on my development VM. In Visual Studio, I used the menu Tools->Extensions and installed “Advanced Installer for Visual Studio 2017” extension. I also updated my Advanced Installer to the latest version.
Then I opened my solution for TMNetSim and created a new project for TMNetSimMSIX, chosing the AdvancedInstaller –> Advanced Installer Desktop Bridge project type. (Note: At the time I did this, Advanced Installer didn’t have a separate MSIX Installer project type. If they do create one, use it instead). When prompted I selected the empty project choice.
I set some project properties, pulled in a reference to the TMNetSim.exe build project, and created a shortcut. To improve the project I then opened it up in the full Advanced Installer Enterprise product. This allowed me to customize the modern app icons and enable signing of the package. I made sure to have both the exe marked for signing as well as the project itself. I built, and then tested the package on a clean VM.
Step 4. Fixing the MSIX File in MSIX Packaging Tool. I determined that my package required me to set some of the new “Capabilities” settings that are new to MSIX. At the time, the AdvancedInstaller tooling didn’t yet support those new properties (they do now), so I opened up the MSIX file in the Packaging Tool, set the new capabilities, and saved off the file. The file is now unsigned, so I used the signtool command to re-sign the package, and tested again.
Step 5. Create my submission to the store. This process is the same as for any store app, however the validation process clearly needs to be a bit different.
My submission was rejected due to the validation process. Even though the app does not ask the user who they are, or have any storage (locally or in the cloud) of any activities or users, the validation process noticed that IP addresses were displayed in the GUI. This meant that I had to have a privacy policy.
Step 6. Resubmit to the store. So I generate one and resubmit to the store.
It was approved this time, and like magic, once 1809 was released it appeared in the store! Well, as least for people on 1809. Which currently isn’t many people as 1809 was pulled due to issues and as of Nov 5 isn’t released now.