This week Microsoft made available a preview of the first publicly available code involving Project Centennial, so I played with it a bit and if you are thinking of doing the same this post might help.
Project Centennial is about taking standard Win32 and .Net applications and creating an AppX package that contains a Windows Universal App (UWA) front end launching point (shortcut or tile) and running the traditional windows executable in an isolated environment that is more like App-V than UWA containerization. It allows existing code, which often does things not allowed in a UWA to be delivered in a UWA.
Project Centennial technology is intended to be used by developers and would include making source level code changes, but this preview app converter allows us to play with converting existing apps without needed the source code. Instead, it just uses the app’s installer and captures the changes made by the installer — leveraging some of the App-V technology the company has to perform the capture (In fact, if you look closely at the container you’ll find a “enable-Appv” commandlet that will excite the AppV folks). Apps that are captured this way still won’t work in the Centennial runtime environment if they do certain things. Like what? Well we really don’t know, but in the video below Microsoft’s John Sheehan mentions that nothing can run under the system context so Windows Services are out. But so are out of process COM objects that need system access. In the Q&A of that video, John also mentioned that apps using UIACCESS=true in the manifest (I’m looking at you SnagIt) are not supported, at least not currently.
If you are getting up to speed, here are some links to what we know already.
- My Blog on Centennial from 2015 Announcement from last year.
- Video: Converter Introduced at Build 2016.
- Official “Desktop App Converter Preview” announcement and download page.
So I played with it this weekend on one of my own apps. While I’d prefer to work with something like the forthcoming WIX extensions to build the package, we have to start here (hint: Rob, get me a beta).
So what do we do?
Simon Binder wrote a good intro example of working with the preview. Check that out first and then return here for more.
So as noted, to use the preview you have to have the right version of Windows 10. The process uses the new Container technology included in the Anniversary edition (aka Redstone) of Windows 10.
What is the Container technology? This is Microsoft’s version of Docker Containers. Especially given how it is used in the Desktop App Converter, you can think of it as a VM with an automatic snapshot. I think that your machine needs to be on real hardware (not a VM, but I stand to be corrected) that supports virtualization. I ran it on a machine with Hyper-V also enabled, so it doesn’t seem to conflict. Simon shows the PowerShell way to enable the Container feature, but you can also go to Program and Features and click the add features link to add it using the GUI.
The Converter uses another Windows 10 image to run in the container, apparently with App-V feature enabled to perform the capture. It starts up the container for you, brings in the files and then runs the installer and pushes the output back out. After that, the container is stopped and thworn away. You have no access to a console in this container when it is running. The container is intended for service software and not users. This is why you must be use a silent install for the conversion.
A problem I found with the preview code is that if you give it a MSI based installer, it ignores the command line parameters that you provide and injects it’s own. Fortunately, a lot of this is driven by PowerShell so I was able to fix this. In the converter_util folder of the converter you can find a number of PowerShell modules. Inside the Sequencer.ps1 file, you can see the following statements:
if ($isMsi)
{
$isolatedEnvInstallCommand = “$env:SystemRoot\system32\msiexec.exe” ↵
$isolatedEnvInstallArguments = “DISABLEADVTSHORTCUTS=1”, “INSTALLSTARTMENUSHORTCUTS=1”, “/quiet”, “/norestart”, “/i”, “`”$isolatedEnvInstallerPath`””, “/L*v”, “`”$isolatedEnvLogPath`”” ↵
if ($InstallerArguments) ↵
{ ↵
$Logger.LogWarning(“Isolated Install: Warning 4100: msi detected. InstallerArguments: $InstallerArguments will not be used, and were instead replaced with $isolatedEnvInstallArguments”) ↵
} ↵
} ↵
else ↵
{ ↵
$isolatedEnvInstallCommand = $isolatedEnvInstallerPath ↵
$isolatedEnvInstallArguments = $InstallerArguments ↵
} ↵
So I replaced that with the following, which allows me to add my own installer arguments while making sure the things they need are there:
if ($isMsi) ↵
{ ↵
$isolatedEnvInstallCommand = “$env:SystemRoot\system32\msiexec.exe” ↵
# $isolatedEnvInstallArguments = “DISABLEADVTSHORTCUTS=1”, “INSTALLSTARTMENUSHORTCUTS=1”, “/quiet”, “/norestart”, “/i”, “`”$isolatedEnvInstallerPath`””, “/L*v”, “`”$isolatedEnvLogPath`”” ↵
# if ($InstallerArguments) ↵
# { ↵
# $Logger.LogWarning(“Isolated Install: Warning 4100: msi detected. InstallerArguments: $InstallerArguments will not be used, and were instead replaced with $isolatedEnvInstallArguments”) ↵
# } ↵
# ############# Tim’s Replacement code follows ######################################## ↵
if ($InstallerArguments) ↵
{ ↵
$Logger.LogWarning(” checking install arguments…”) ↵
$DidMakeInstallerrgChanges = $false ↵
$isolatedEnvInstallArguments = “” ↵
if ($InstallerArguments -notlike “*DISABLEADVTSHORTCUTS*”) ↵
{ ↵
$isolatedEnvInstallArguments = $isolatedEnvInstallArguments + ” DISABLEADVTSHORTCUTS=1 ” ↵
$DidMakeInstallerrgChanges = $true ↵
} ↵
if ($InstallerArguments -notlike “*INSTALLSTARTMENUSHORTCUTS*”) ↵
{ ↵
$isolatedEnvInstallArguments = $isolatedEnvInstallArguments + ” INSTALLSTARTMENUSHORTCUTS=1 ” ↵
$DidMakeInstallerrgChanges = $true ↵
} ↵
if ($InstallerArguments -notlike “*/q*”) ↵
{ ↵
$isolatedEnvInstallArguments = $isolatedEnvInstallArguments + ” /quiet ” ↵
$DidMakeInstallerrgChanges = $true ↵
}
if ($InstallerArguments -notlike “*/norestart*”) ↵
{ ↵
$isolatedEnvInstallArguments = $isolatedEnvInstallArguments + ” /norestart ” ↵
$DidMakeInstallerrgChanges = $true ↵
} ↵
$isolatedEnvInstallArguments = $isolatedEnvInstallArguments + ” /i ” + “`”$isolatedEnvInstallerPath`”” + ” ” ↵
$DidMakeInstallerrgChanges = $true ↵
if ($InstallerArguments -notlike “*/L*”) ↵
{ ↵
$isolatedEnvInstallArguments = $isolatedEnvInstallArguments + ” /L*v ” + “`”$isolatedEnvLogPath`”” + ” ” ↵
$DidMakeInstallerrgChanges = $true ↵
} ↵
$isolatedEnvInstallArguments = $isolatedEnvInstallArguments + $InstallerArguments ↵
if ($DidMakeInstallerrgChanges -eq $true) ↵
{ ↵
$Logger.LogWarning(“Isolated Install: Warning 4100(TRM): msi detected. InstallerArguments were updated: $isolatedEnvInstallArguments”) ↵
} ↵
} ↵
else ↵
{ ↵
$isolatedEnvInstallArguments = “DISABLEADVTSHORTCUTS=1”, “INSTALLSTARTMENUSHORTCUTS=1”, “/quiet”, “/norestart”, “/i”, “`”$isolatedEnvInstallerPath`””, “/L*v”, “`”$isolatedEnvLogPath`”” ↵
$Logger.LogWarning(“Isolated Install: Warning 4100: msi detected. InstallerArguments: $InstallerArguments will not be used, and were instead replaced with $isolatedEnvInstallArguments”) ↵
} ↵
# ############# End Tim’s Replacement code ####################################### ↵
} ↵
else ↵
{ ↵
$isolatedEnvInstallCommand = $isolatedEnvInstallerPath ↵
$isolatedEnvInstallArguments = $InstallerArguments ↵
} ↵
Now the powershell file is signed by Microsoft, so making the edit invalidates that signature. Since I’m only hacking for my own use, I just removed the existing signature from the bottom on the file. As long as the PowerShell execution policy is set to ByPass, this is OK. While you might not want Bypass on production systems, on a system that only an admin is using to perform this conversion should be OK. (This is why I’ll never be hired as a CISO). With this change, it allows me to run the converter using the following command:
.\DesktopAppConverter.ps1 -ExpandedBaseImage C:\ProgramData\Microsoft\Windows\Images\BaseImage-14316\ -Installer “C:\users\admin\desktop\AVM\Setup_AppVManage.msi” -Destination C:\Users\admin\Desktop\AVM_Output -PackageName “AppVManage” -Publisher “CN=TMurgent” -Version 5.1.3.0 -InstallerArguments “CONTENTUNC=””\\tmuhost\ContentNext”” DEBUGLOGLEVEL=0″↵
Being able to completely configure the install is very important, and I’ll guess that Microsoft improves the converter along these lines in the future!
So what happens when your silent install doesn’t complete because you, eh messed up, the parameters? Well the PowerShell doesn’t complete and your installer log file doesn’t make it to the output folder you designated. But if you look in the folder C:\DesktopAppConverter, you’ll find a subfolder with a GUID for a name. Sort by date and open the newest folder to see all of the log files.
Some notes regarding the certificate work that follows the package creation.:
- Simon’s post contains some errors, missing a key command. Just look at the reference in his article to making an AppX package from scratch for the correct syntax.
- When you create the cert, since you are probably just testing you can just use a dummy signer name you don’t need to set a password.
- And by the way, if you intend to send the package up to the Microsoft store, they throw away your cert and use their own, so you only need to worry about signing this for testing and for private use.
Some notes on the resulting package:
- Simon’s note about needing to add the root cert to the local machine cert store is not in relation to signing the appx, but for adding the signed package to a test system, whether the same system you created the package on or another.
- I’m pretty sure that you also need to enable side-loading on the machine (found under “Notifications” tray icon, “Settings”, “Update & Security”, “For Developers”).
- The icon on your shortcut will look like a rectangle box with an X. This is the default icon that AppX uses. The Appx Icon is actually a live tile that has multiple sizes so they don’t use the original icon from your installer. To fix this, we probably need to create the real Appx Package using future tooling more in line with what was shown at Build 2016. Here is what it looks like in the start menu:

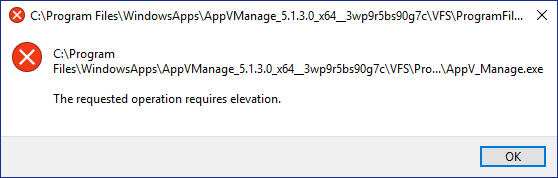
I selected AppVManage for my test, because I knew that it had an internal manifest to attempt elevation and I want to see what happens. (My philosophy is that you always learn more through failure than success). This causes the following error when you launch the app and it tries to elevate: